Chào mừng bạn đến với blog của mình, hôm nay chúng ta sẽ cùng tìm hiểu cách viết 1 chrome extension đơn giản dễ thực hiện.
Đầu tiên bạn tạo 1 thư mục tên là demo chứa các file như hình sau:
File manifest.json là nơi chúng ta sẽ thiết lập các cài đặt cho extension, các bạn mở manifest và nhập đoạn code sau:
{
"manifest_version":2,
"name": "Demo",
"version":"1.0",
"browser_action":{
"default_popup":"popup.html"
},
"content_scripts":[
{
"matches":["http://*/*","https://*/*"],
"js":["run.js"]
}
],
"permissions" : [
]
}
Mình sẽ giải thích các lệnh ở bài sau nha, bài này chúng ta cứ tạo được 1 chrome extension đi đã."manifest_version":2,
"name": "Demo",
"version":"1.0",
"browser_action":{
"default_popup":"popup.html"
},
"content_scripts":[
{
"matches":["http://*/*","https://*/*"],
"js":["run.js"]
}
],
"permissions" : [
]
}
popup.html là giao diên của extension khi xuất hiện trên chrome, bạn mở lên và nhập đoạn code sau:
<!DOCTYPE html>
<html>
<head>
<meta charset="utf-8">
<meta http-equiv="X-UA-Compatible" content="IE=edge">
<title>test</title>
<link rel="stylesheet" href="">
<script src="popup.js" type="text/javascript" charset="utf-8" async defer></script>
</head>
<body>
<button id="demo" style="margin-top: 10px;">Start Demo</button>
</body>
</body>
</html>
popup.js là nơi thực hiện các lệnh js cho từ file popup.html, bạn mở file và nhập vào:
document.getElementById("demo").onclick = function() {myFunction()};
function myFunction() {
console.log("popup.js > run.js");
chrome.tabs.query({active: true, currentWindow: true}, function(tabs) {
chrome.tabs.sendMessage(tabs[0].id, {greeting:"hello" }, function(response) {
console.log(response.farewell);
});
});
}
function myFunction() {
console.log("popup.js > run.js");
chrome.tabs.query({active: true, currentWindow: true}, function(tabs) {
chrome.tabs.sendMessage(tabs[0].id, {greeting:"hello" }, function(response) {
console.log(response.farewell);
});
});
}
run.js, 1 chrome extension thường làm việc với 1 trang web nhất định và run.js này là file sẽ được nhúng vào trang web đó để chạy các lệnh trong extension, đây thường sẽ là file làm việc chính của chúng ta. Các bạn mở file và code như sau:
chrome.runtime.onMessage.addListener(function(request, sender, sendResponse) {
if (request.greeting == "hello"){console.log(request.greeting);
sendResponse({farewell: "run.js nhan duoc"});
alert('hello');
}
});
Thế là hoàn tất phần code cho extension rồi đấy, giờ hãy cài nó vào chrome để test thử(các bạn xem bài này nếu chưa biết cách cài chrome extension từ máy tính)if (request.greeting == "hello"){console.log(request.greeting);
sendResponse({farewell: "run.js nhan duoc"});
alert('hello');
}
});
Sau khi cài demo extension ở phần extension bar sẽ xuất hiện icon chữ D là extension của chúng ta do ta chưa set icon cho nó:
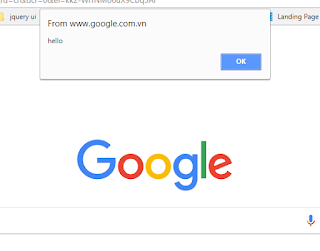
Ta click vào chữ D và click vào butoon start demo, nếu xuất hiện 1 alert hello thì bạn đã thành công rồi đấy :)
 |
| Hướng dẫn chrome extension |


Nhận xét
Đăng nhận xét