
Trong bài này chúng ta sẽ tìm hiểu về vòng đời của một React component và các methods để quản lý vòng đời này.
Lifecycle Methods
- componentWillMount đây là method sẽ được thực thi trước khi 1 component được render trên cả server side và client side.
- componentDidMount method này được thực thi khi 1 component được render trên client side. Đây là nơi các hàm AJAX requests, DOM or update state được thực thi. Method này cũng đucợ sử dụng để kết nối với các JS Framework khác và các function với delayed execution như setTimeout or setInterval.
- componentWillReceiveProps sẽ được thực thi ngay khi thuộc tính props (tìm hiểu props là gì?) được update và trước khi component được render lại. Trong ví dụ dưới, ta sẽ sử dung method này vùng với setNewNumber để update state.
- shouldComponentUpdate sẽ trả về kết quả true or false. Phương thức này sẽ xác định 1 component có được update hay không. Mặc định giá trị này là true. Nếu bạn không muốn component render lại sau khi update state hay props thì return giá trị thành false. Các bạn xem ví dụ dưới để hiểu rõ.
- componentWillUpdate được gọi khi chúng ta update state của component trước khi nó render lại.
- componentDidUpdate sau khi componentWillUpdate ở trên được gọi xong thì đến lượt thằng này được goi.
- componentWillUnmount được gọi khi chúng ta unmout 1 component kiểu như xóa nó khỏi react.
Chúng ta xem ví dụ dưới đây để hiểu rõ hơn về các methods ở trên. Chúng ta sẽ khởi tạo state trong App.js, hàm setNewnumber sẽ được dùng để update state và các life cycle methods nằm trong content component
App.js
import React from 'react';

class App extends React.Component {
   constructor(props) {
      super(props);

      this.state = {
         data: 0
      }
      this.setNewNumber = this.setNewNumber.bind(this)
   };
   setNewNumber() {
      this.setState({data: this.state.data + 1})
   }
   render() {
      return (
         <div>
            <button onClick = {this.setNewNumber}>INCREMENT</button>
            <Content myNumber = {this.state.data}></Content>
         </div>
      );
   }
}
class Content extends React.Component {
   componentWillMount() {
      console.log('Component WILL MOUNT!')
   }
   componentDidMount() {
      console.log('Component DID MOUNT!')
   }
   componentWillReceiveProps(newProps) {
      console.log('Component WILL RECIEVE PROPS!')
   }
   shouldComponentUpdate(newProps, newState) {
      return true;
   }
   componentWillUpdate(nextProps, nextState) {
      console.log('Component WILL UPDATE!');
   }
   componentDidUpdate(prevProps, prevState) {
      console.log('Component DID UPDATE!')
   }
   componentWillUnmount() {
      console.log('Component WILL UNMOUNT!')
   }
   render() {
      return (
         <div>
            <h3>{this.props.myNumber}</h3>
         </div>
      );
   }
}
export default App;
import React from 'react';
import ReactDOM from 'react-dom';
import App from './App.jsx';

ReactDOM.render(<App/>, document.getElementById('app'));

setTimeout(() => {
   ReactDOM.unmountComponentAtNode(document.getElementById('app'));}, 10000);
Kết quả render ta được:
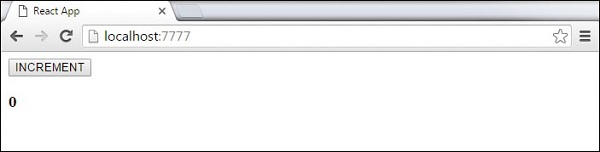
Lúc này chỉ có 2 methods được thực thi, đó là componentWillMount và componentDidMount
Khi chúng ta click vào button INCREMENT quá trình update state xảy ra và các life cycle methods khác sẽ được thực hiện

Nhớ hàm timeout chúng ta đã set chứ? Bây giờ sau 10s App component sẽ bị unmount và method cuối cùng được thực hiện:
Kết thúc bài 7 ở đây mọi người có thắc mắc gì thì comment bên dưới nha, mình sẽ trả lời trong vòng 24h.
Những bài viết của anh rất dễ hiểu, rất mong những bài viết tiếp theo. Cảm ơn anh nhiều!
Trả lờiXóaCảm ơn sự quan tâm của bạn dành cho blog của mình :)
XóaExcellent article. Very interesting to read. I really love to read such a nice article. AngularJS 5 Online Course Bangalore
Trả lờiXóaThis blog is helpful for everyone. Thanks for sharing
Trả lờiXóaFull Stack Training in Hyderabad
Full Stack Training in Ameerpet