Do you know Magento? It's a free e-commerce platform designed based on the Zend Framework. PHP developers are certainly familiar with it. Also, due to its intriguing features, it's a compelling software, much like WooCommerce or PrestaShop versions.
Is Magento tools the best? This is a question with no clear answer and entirely depends on each person's needs. However, I do not negate my preference. WooCommerce for WordPress.
In this tutorial, we want to show you how to create a Magento Store. While we'll be doing this in a development environment, if you have the convenience facilities provided for testing purposes, you can also do it online."
Downloading and Installing WAMP Server
If you need a server, and the one I recommend is WampServer, which is provided for free. The installation is straightforward, but for Windows users, there might be a need to install "Visual C++" (especially if the WampServer indicator remains red). For users of different operating systems (other than Windows), you have MAMP for Mac OS users and LAMP for Linux users.
After installing WampServer, you need to locate the "WWW" folder. This is usually available in the following location: "C:/WAMP/www". Replace it with the hard drive where your "C:/Windows" system is located.
Creating a Database
After installing WampServer, when the LED at the bottom right turns green (where is the time on the taskbar), you can access the local database manager. Just enter the following address: http://127.0.0.1/phpmyadmin.
On the new page, you'll see a field where you can specify the database name. Click on "donnees," and then click on "Create."
Magento is free software. It's available on the official platform. On this page, you can find several downloadable versions. Choose "Full Release" to download.
Now, enter the following address to access Magento on the server: http://127.0.0.1/magento
Before "Magento" in the URL, there should be the name of the folder where the extracted contents were placed within the "www" folder.
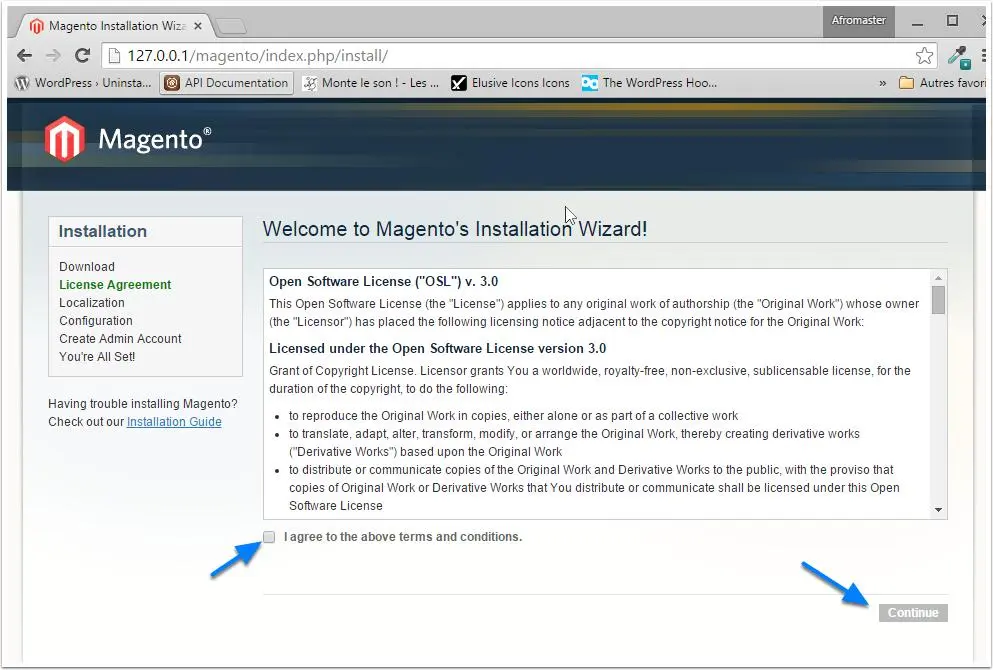
"You should click 'I agree to the terms and conditions...' If you agree to the terms of use, please click 'Continue'."
In the next step, you'll see a message asking you to set the language, time zone, and currency. After that, click 'Continue' to define the setup.
On the next page, you need to configure the connection options for the database. We created a database named "magento" earlier.
For local development, the default username is usually "root," and the password is empty. So, fill in the fields accordingly based on this information.
Once done, click "Continue." The Magento store will be installed. After the installation is complete, you just need to add an admin account.
You can leave the field for "Encryption Key" empty, and Magento will handle it. Click "Continue" to complete the installation.
Now the installation is ready. You can go to the dashboard (back-end) or the public interface (front-end).
The appearance of the store will be as follows.
The appearance of the backend is as follows.





Nhận xét
Đăng nhận xét