Chuyển đến nội dung chính

Bài 9: ReactJS - Tìm hiểu Events trong React

Trong bài này chúng ta sẽ cùng tìm hiểu cách xử lý các events trong React.

Simple Example

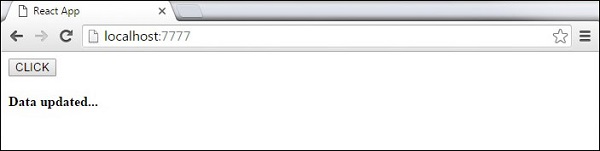
Trong ví dụ này chúng ta sẽ sử dụng một component cùng với onClick event dùng để  update state khi ta click vào button.

App.js
import React from 'react';

class App extends React.Component {
   constructor(props) {
      super(props);
      
      this.state = {
         data: 'Initial data...'
      }
      this.updateState = this.updateState.bind(this);
   };
   updateState() {
      this.setState({data: 'Data updated...'})
   }
   render() {
      return (
         <div>
            <button onClick = {this.updateState}>CLICK</button>
            <h4>{this.state.data}</h4>
         </div>
      );
   }
}
export default App;
Index.js
import React from 'react';
import ReactDOM from 'react-dom';
import App from './App.jsx';

ReactDOM.render(<App/>, document.getElementById('app'));
Kết quả ta được:

Child Events

Khi chúng ta muốn update state của component cha từ component con, ta tạo 1 event handler(updateState) ở component cha và chuyền nó xuống component con thông qua prop (updateStateProp). Các bạn xem ví dụ sau:

App.js
import React from 'react';

class App extends React.Component {
   constructor(props) {
      super(props);
      
      this.state = {
         data: 'Initial data...'
      }
      this.updateState = this.updateState.bind(this);
   };
   updateState() {
      this.setState({data: 'Data updated from the child component...'})
   }
   render() {
      return (
         <div>
            <Content myDataProp = {this.state.data} 
               updateStateProp = {this.updateState}></Content>
         </div>
      );
   }
}
class Content extends React.Component {
   render() {
      return (
         <div>
            <button onClick = {this.props.updateStateProp}>CLICK</button>
            <h3>{this.props.myDataProp}</h3>
         </div>
      );
   }
}
export default App;
Index.js
import React from 'react';
import ReactDOM from 'react-dom';
import App from './App.jsx';

ReactDOM.render(<App/>, document.getElementById('app'));
Kết quả ta được:
huong dan reactjs

Nhận xét

Bài đăng phổ biến từ blog này

Tổng hợp danh sách các trang web lấy backlink cực tốt (P.1)

Đi backlink  trong SEO là điều mà ai cũng phải biết và đầu tư cho nó nhiều nhất. Dưới đây, mình chia sẻ các trang web có thể đi backlink khá tốt cho mọi người. Mỗi ngày các bạn tạo 1 bài post sau đó post lên 10 trang trong tổng số 40 trang này, hôm sau cũng viết 1 bài khác rồi post lên 10 trang kế, khi hết thì quay vòng lại 10 trang đầu, mình sẽ update thêm các website nên các bạn cứ yên tâm không lo hết. (Các bạn nhớ bookmark lại kẻo quên trang mình nha :) ) Nếu các bạn không rõ về DA PA IN-EXTERNAL Links thì xem ở đây:  Các chỉ số quan trọng cần biết khi làm SEO ID URL DA PA Internal Links External Links Alexa Global Rank Alexa Local Rank 1 http://diendan.zing.vn/ 63,17 54,5 168 19 701 9 2 http://vatgia.com/ 62,61 57,34 984 23 8086 71 3 http://forum.ueh.edu.vn/ 49,82 38,88 555 43 92060 774 4 http://www.5giay.vn/ 47,12 55,72 445 12 43

Viết game flappy bird bằng HTML và JavaScript (P.1)

Hôm nay chúng ta sẽ viết một game tương tự flappy bird bằng HTML và JavaScript một cách đơn giản, bài viết không chỉ giúp bạn nâng cao khả năng lập tình HTML JS mà còn tạo ra 1 sản phẩm thú vị cho nên các bạn chịu khó theo dõi nha. Các bạn xem demo sản phẩm khi chúng ta hoàn thành trên fiddle:  Demo  đây chỉ là demo cơ bản thôi, khi xem xong bài viết này các bạn có thể làm hay hơn thế nữa :)). Nào ta bắt đầu thôi. HTML Canvas Đầu tiên để tạo game chúng ta cần tạo background cho nó, chúng ta sẽ dùng HTML Canvas , Canvas là một element tuyệt vời cho việc thiết kế game trong HTML. Chúng ta sẽ dùng Js để vẽ trên Canvas. Nếu các bạn chưa biết về Canvas mình có để link phía dưới để các bạn tìm hiểu nên hiện giờ cứ yên tâm mà xem tiếp nha. Bây giờ các bạn tạo 1 file html và nhập đoạn code sau: <!DOCTYPE html> <html> <head> <meta name="viewport" content="width=device-width, initial-scale=1.0"/> <style> canvas {

Xdebug, PhpStorm and Docker - Why it not working?

  Lately, i start new job with Magento, and while setup IDE for project i face problem with Xdebug, PhpStorm and Docker. It took me a lot of hours to find out and make it work. So i write this post to save some step for you guys also me some way to solve the stuck when we got. 1. How Xdebug work: Link  i founded this article with quite easy understand explanation how xdebug work, so spend some minutes to read it, we need to understans the thing we do to easy to solve it. 2: Define Xdebug is installed on server: With php -v you should see Xdebug showed. And with phpinfo() If you dont see it showed, it mean you have not installed it or it not enable Checking if you have enable extension from your php ini. Or if you have not installed it, consider its document: Link . 3. Now if you make sure xdebug installed but your break point at PhpStorm not break, continue these steps: In phpinfo(), make sure  xdebug.remote_enable is On cause you are using docker container, also checking  xdebug.remot